How to Install SSL Certificate on Web Host Manager (WHM)?

If you want to install an SSL certificate on your Web Host Manager (WHM) server but lack the necessary know-how, don’t panic – as this article is for you. But, before we start exploring the installation process, it is essential to address a prerequisite: CSR Generation.
Before moving to Installation Step, Just Follow Steps to Generate CSR for WHM Server
How to Install an SSL Certificate on a Web Host Manager Server?
Follow the steps mentioned below to install an SSL certificate on WHM:
- Enter your login credentials to access the WHM dashboard.
- The WHM dashboard will open.
- In the right pane, click the SSL/TLS option.
- On the SSL/TLS Manager page, click the Install an SSL Certificate on a Domain option.
- In the Domain field, type the domain name you want to secure.
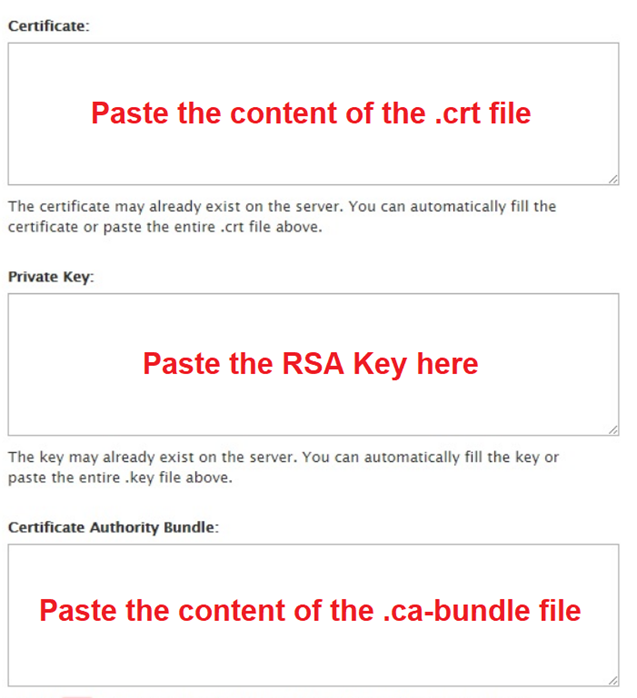
- In the Certificate box, paste the content of the .crt file, starting from, including – “BEGIN CERTIFICATE” to “END CERTIFICATE.”
- Use the autofill feature to add the private key automatically in the Private Key box. (This is possible only if the user has generated the CSR in the same WHM account.)
- In the Certificate Authority Bundle (optional) box, paste the content of the .ca-bundle file. (if needed)
- Click Install.

Note:
- To copy the certificates (if required), use a text editor like Notepad.
- If you want to add the Private Key manually, find the file containing – “BEGIN RSA PRIVATE KEY” to “END RSA PRIVATE KEY tags.”
- Restart the Apache server if required.
Test the SSL Installation
It is always advisable to inspect or test the certificate’s installation status. To do this, use – SSL testing tools like SSL Checker, SSL Labs, etc. If there are any vulnerabilities or potential errors, you can find them instantly and get a detailed report regarding the same by using these tools.
Need Help while SSL Installation on Web Host Manager?
– Contact Our Support Team or Buy SSL Installation Service

